Learning how to install vinyl siding is a great way for homeowners to understand how exterior remodeling works and what to expect during a professional installation. Vinyl siding is one of the most popular choices in Wisconsin because it is durable, low maintenance, and able to withstand the region’s changing seasons. Knowing the basics of installation helps you recognize quality craftsmanship and spot issues before they become bigger problems.
Here’s what you’ll learn in this guide:
- Installation stages: What happens from tear-off to final inspection.
- Tools and preparation: What crews use to ensure long-lasting performance.
- Professional insight: Why proper installation matters in Wisconsin’s climate.
Why Vinyl Siding Installation Matters
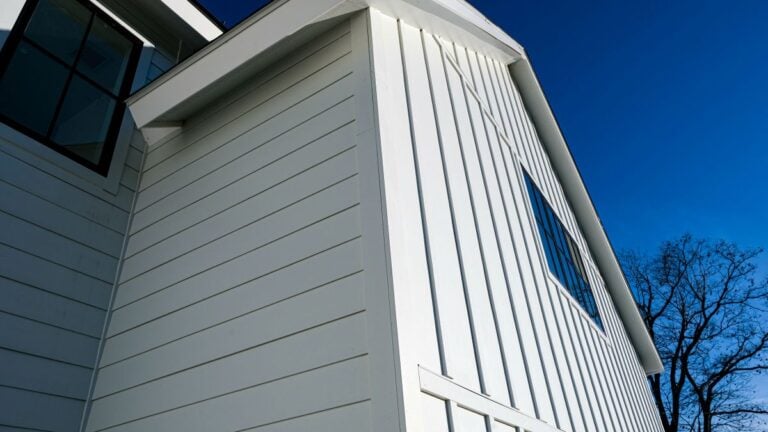
Vinyl siding is an investment in your home’s protection and curb appeal. Proper installation ensures that each panel expands, contracts, and sheds water the way it is designed to, which is especially important in Wisconsin’s freeze-thaw cycles. A quality install also protects the wall beneath, prevents moisture issues, and helps your siding last its full lifespan.

Benefits of Professionally Installed Vinyl Siding
- Weather protection: Correctly installed siding shields your home from wind, snow, and rain.
- Improved insulation: When paired with house wrap or foam board, it helps maintain indoor comfort.
- Reduced maintenance: Quality installation prevents warping, buckling, and premature wear.
Common Installation Challenges
- Improper nailing: Overdriven nails prevent siding from expanding properly.
- Gaps and misalignment: Uneven spacing can lead to moisture intrusion.
- Poor preparation: Skipping house wrap or failing to repair the wall beneath leads to long-term issues.
Tools and Materials Needed for Vinyl Siding
Having the right tools is essential for a proper siding installation. Professionals use specialized equipment to ensure a precise, secure fit that lasts for decades.
Essential Tools
- Siding removal tools: Used to detach old siding without damaging the structure.
- Utility knives and snips: Allow precise trimming of vinyl panels.
- Tape measures and levels: Ensure straight, even lines across the entire wall.
- Hammer or nail gun: Used to fasten siding while maintaining proper spacing.
Materials Used
- Vinyl panels: The main siding components available in various styles and colors.
- Starter strips: Installed at the bottom to anchor the first row of siding.
- House wrap: Creates a moisture barrier between siding and wall sheathing.
- J-channels and corner posts: Create clean transitions around windows, doors, and edges.

Step-by-Step Vinyl Siding Installation Process
Vinyl siding installation follows a structured sequence to ensure proper water drainage, thermal expansion, and visual alignment. These steps reflect the same best practices used by professionals in Stevens Point and surrounding areas.
Step 1: Prepare the Work Area
- Remove old siding: Tear-off ensures a clean surface and reveals any hidden rot.
- Inspect and repair: Check sheathing and framing for water damage or decay.
- Install house wrap: Add a moisture barrier to protect against wind-driven rain.
Step 2: Install Starter Strips and Accessories
- Leveling strips: Ensure starter strips are perfectly aligned, since the first row affects the entire wall.
- Corner posts: Installed vertically at the edges to give panels a secure channel.
- J-channels: Positioned around doors, windows, and soffits to create clean borders.
Step 3: Measure and Cut Vinyl Panels
- Careful measurements: Panels must be cut with precision to maintain alignment.
- Expansion gaps: Leave small gaps at ends to allow movement during weather changes.
- Smooth edges: Trimmed ends should fit cleanly into channels without buckling.
Step 4: Attach the Vinyl Panels
- Loose nailing: Fasteners should be driven in the center of the nail slot to allow movement.
- Overlapping seams: Panels overlap slightly to create a watertight exterior.
- Proper locking: Each panel snaps into the one below it for secure installation.
Step 5: Finish Around Openings
- Windows and doors: Use J-channels and flashing for moisture control.
- Soffit and fascia: These areas require detailed cuts for a clean finish.
- Final trim work: Adds polished edges and protects vulnerable areas.
6 Key Steps to Complete a Vinyl Siding Installation
These essential steps outline the major checkpoints in a typical vinyl siding installation and help homeowners understand what to expect throughout the process.

- Inspect the wall surface: Ensure sheathing is solid, dry, and free from damage before installing new siding.
- Install moisture barriers: Apply house wrap or rigid insulation to improve energy efficiency and protect the home.
- Set starter strips: Level installation at the base ensures every row above lines up correctly.
- Place accessories: Corner posts, flashing, and channels go up before the main siding panels.
- Attach siding panels: Snap, overlap, and nail according to manufacturer guidelines to prevent warping.
- Perform a final inspection: Ensure even lines, secure fasteners, and proper spacing across all walls.
Common Mistakes to Avoid During Installation
Understanding what can go wrong helps homeowners identify quality workmanship. Proper installation is essential for long-term siding performance, especially in areas with cold winters and strong summer humidity.
Overdriving Nails
- Restricted movement: Tight nails prevent expansion, causing buckling during heat.
- Cracking risk: Panels can crack around the nail slot if fastened too tightly.
- Long-term problems: Improper nailing shortens siding lifespan drastically.
Poor Panel Alignment
- Visible gaps: Misaligned panels allow moisture intrusion.
- Crooked rows: Even small mistakes create noticeable unevenness across the wall.
- Wind vulnerability: Loose edges can lift during storms in Stevens Point and surrounding areas.
Skipping Moisture Barriers
- Water intrusion: Missing house wrap leads to mold or rot behind the siding.
- Reduced insulation: Air leaks increase heating and cooling costs.
- Warranty issues: Many siding manufacturers require moisture barriers for warranty coverage.

How Long Does Vinyl Siding Installation Take?
Installation timelines depend on weather, home size, and the amount of preparation needed. Most projects in Wisconsin take a few days to complete from start to finish.
Weather Considerations
- Cold temperatures: Vinyl becomes brittle and harder to cut in winter.
- Rain delays: Wet surfaces can interfere with moisture barrier installation.
- Windy days: Strong gusts can make handling large panels difficult.
Home Size and Complexity
- Single-story homes: Typically faster due to easier access.
- Multiple stories: Require additional equipment and safety measures.
- Architectural details: More windows, corners, and angles increase installation time.
Get Professional Vinyl Siding Installation You Can Trust
Understanding how to install vinyl siding helps homeowners recognize quality workmanship and understand the steps that go into a durable, beautiful exterior. Whether your siding is outdated, damaged, or simply ready for an upgrade, proper installation ensures long-term protection and curb appeal.
Vanguard Roofing & Siding proudly serves Stevens Point and surrounding areas with expert siding installation, detailed inspections, and customer-focused service. Contact us today to schedule your free inspection and get started on transforming your home with new vinyl siding.
Recent Articles