
Knowing how to clean vinyl siding properly can keep your home looking fresh, prevent mildew growth, and extend the life of your exterior. While vinyl siding is low-maintenance, it still benefits from regular cleaning to remove dirt, pollen, mold, and grime. Not sure if your vinyl siding just needs a good cleaning, or if it’s time for a full replacement? Read on!
In this guide, we’ll walk you through:
- Essential tools and supplies: What you need to get started
- Safe and effective techniques: Avoid damage while getting the best results
- Common mistakes to avoid: Learn what not to do when cleaning your siding
Let’s dive into the step-by-step process for cleaning vinyl siding the right way.
❗️ Why Regular Vinyl Siding Cleaning Matters
Vinyl siding may be durable and weather-resistant, but it’s not immune to buildup. Over time, algae, mildew, dust, and air pollution can cling to the surface and create stains or discoloration. If left untreated, this buildup can impact your home’s curb appeal and even affect the siding’s longevity.
- Curb appeal: Clean siding makes your entire home look well-maintained.
- Preventative care: Washing away mold and mildew helps prevent potential staining or deterioration.
- Longevity: A well-maintained siding surface is less likely to need premature repairs or replacement.
🧽 Tools and Supplies You’ll Need
Before you get started, gather the following materials:
- Garden hose: A standard hose with a spray nozzle is perfect for rinsing.
- Soft-bristle brush or long-handled siding brush: For manual scrubbing in hard-to-reach areas.
- Bucket: For mixing your cleaning solution.
- Mild cleaning solution: Either store-bought vinyl siding cleaner or a homemade mix (see below).
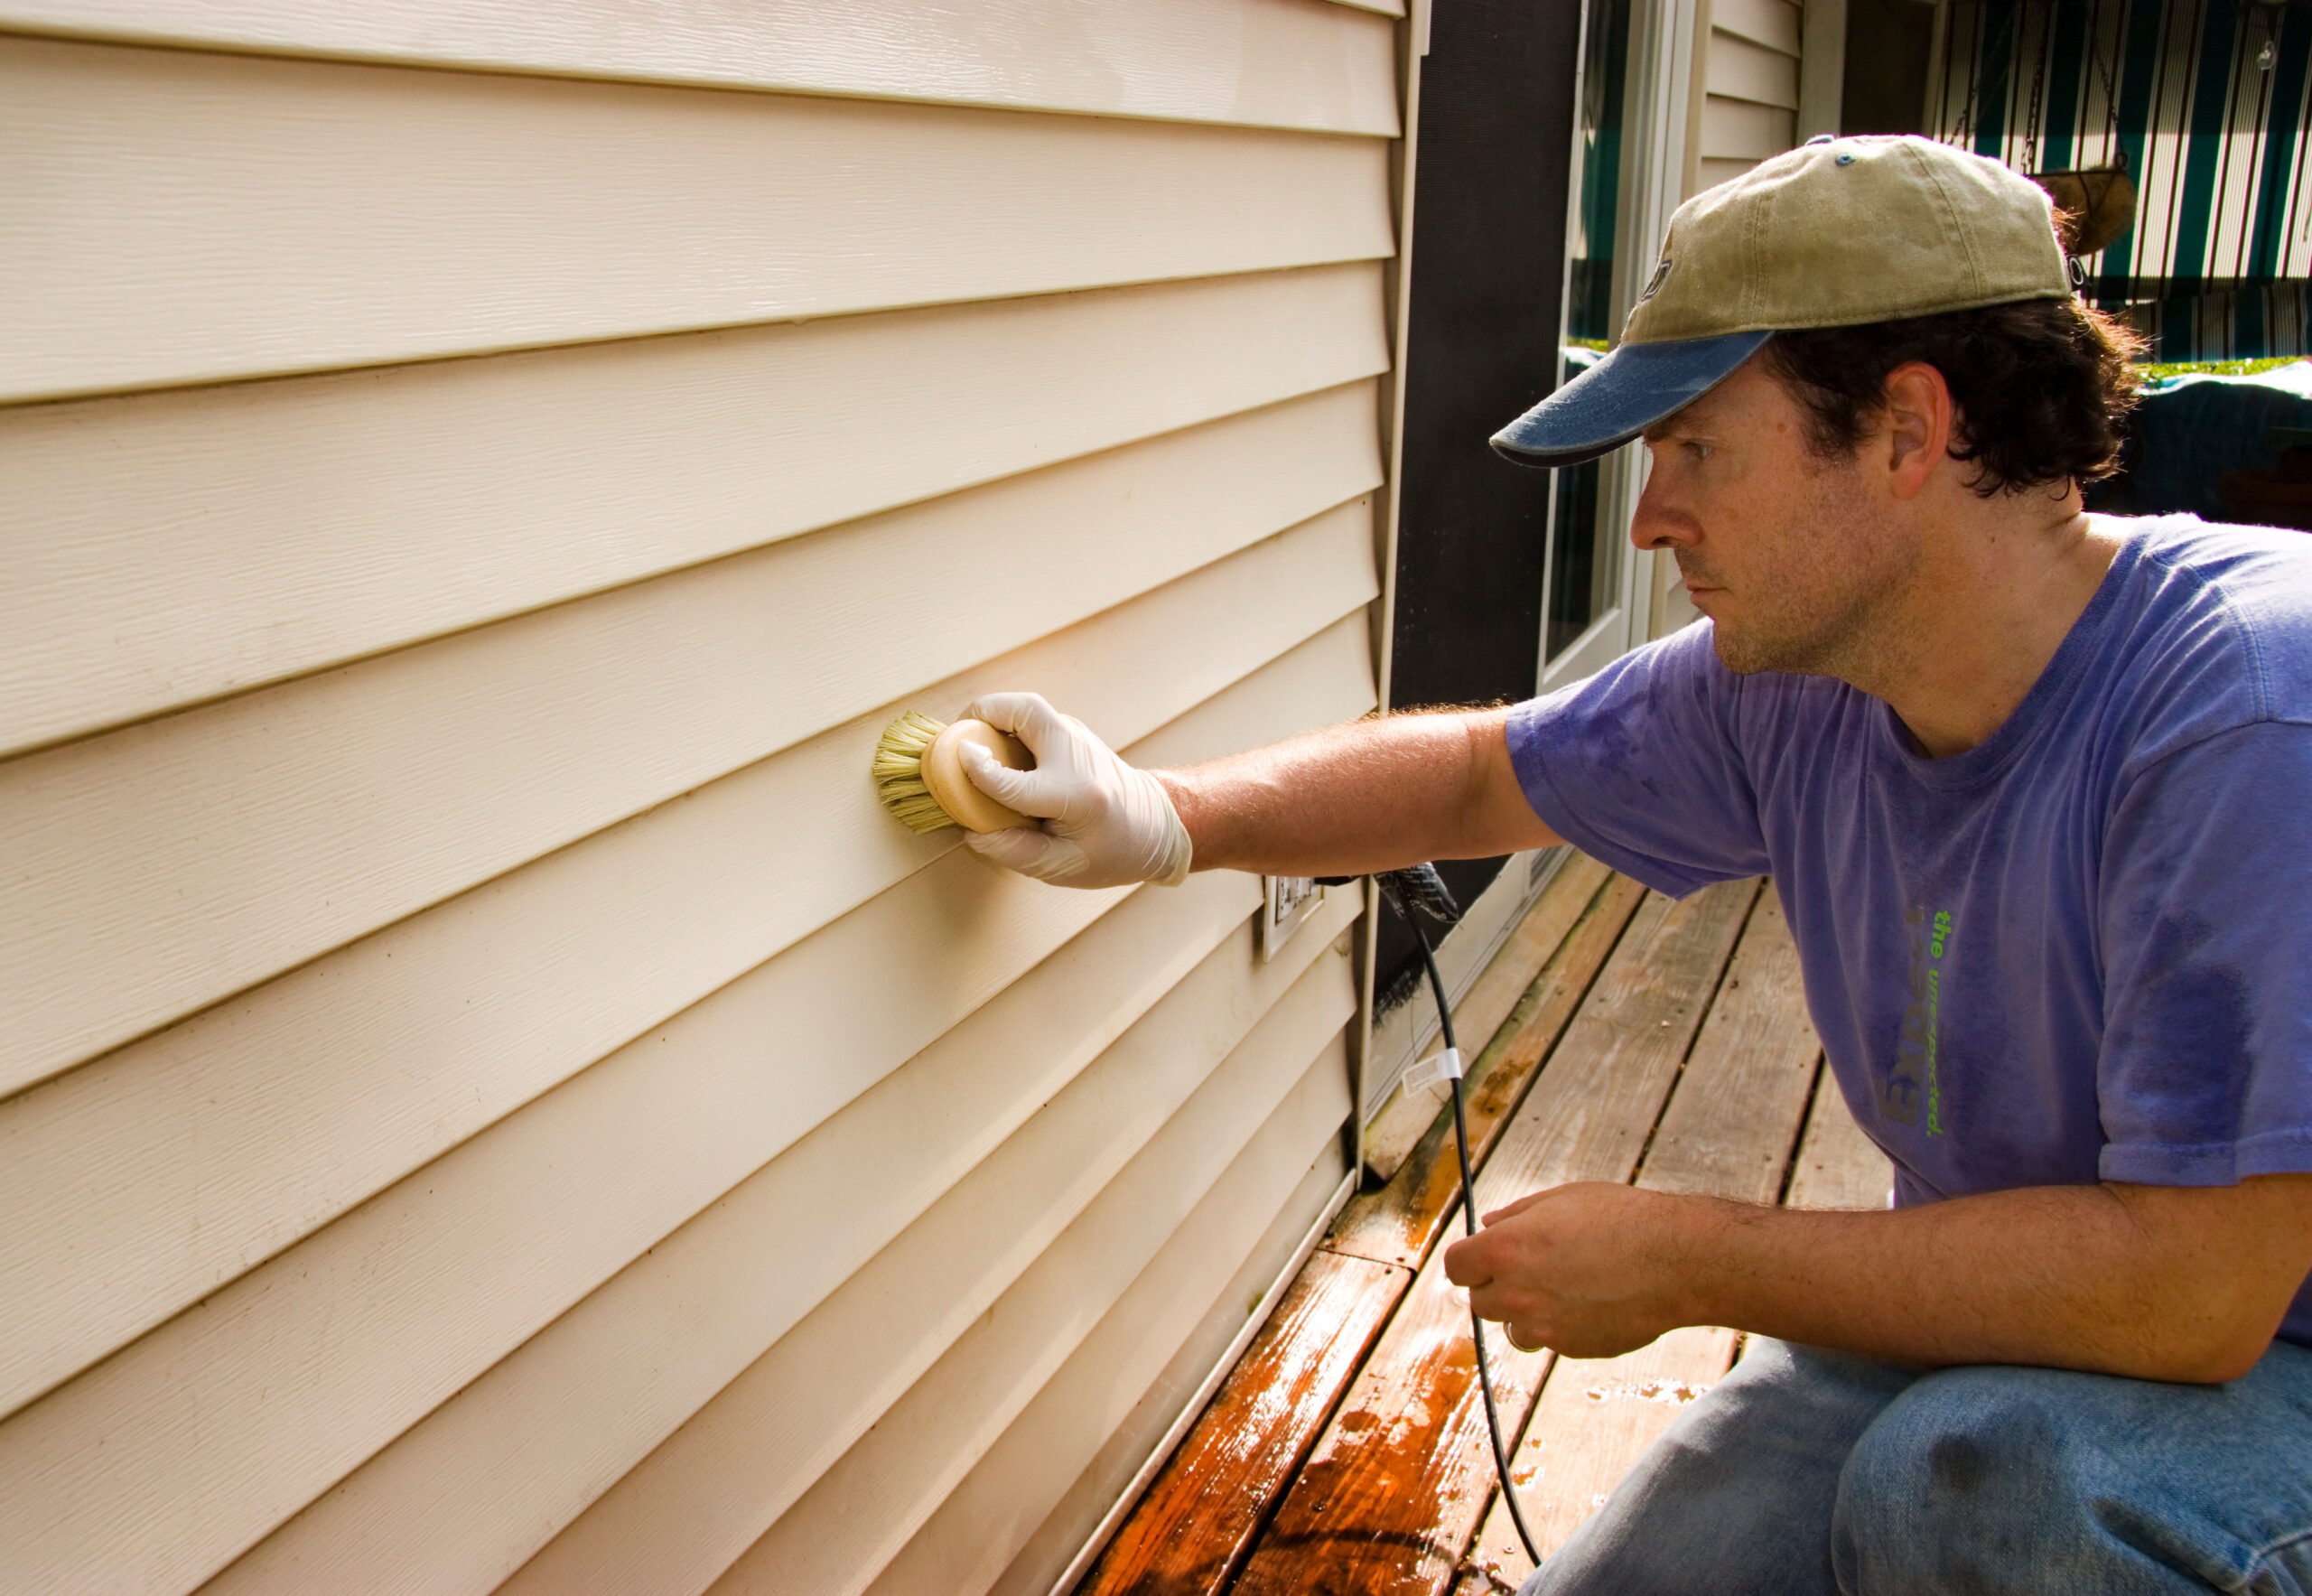
- Protective gear: Gloves, safety glasses, and clothing you don’t mind getting wet.
Optional:
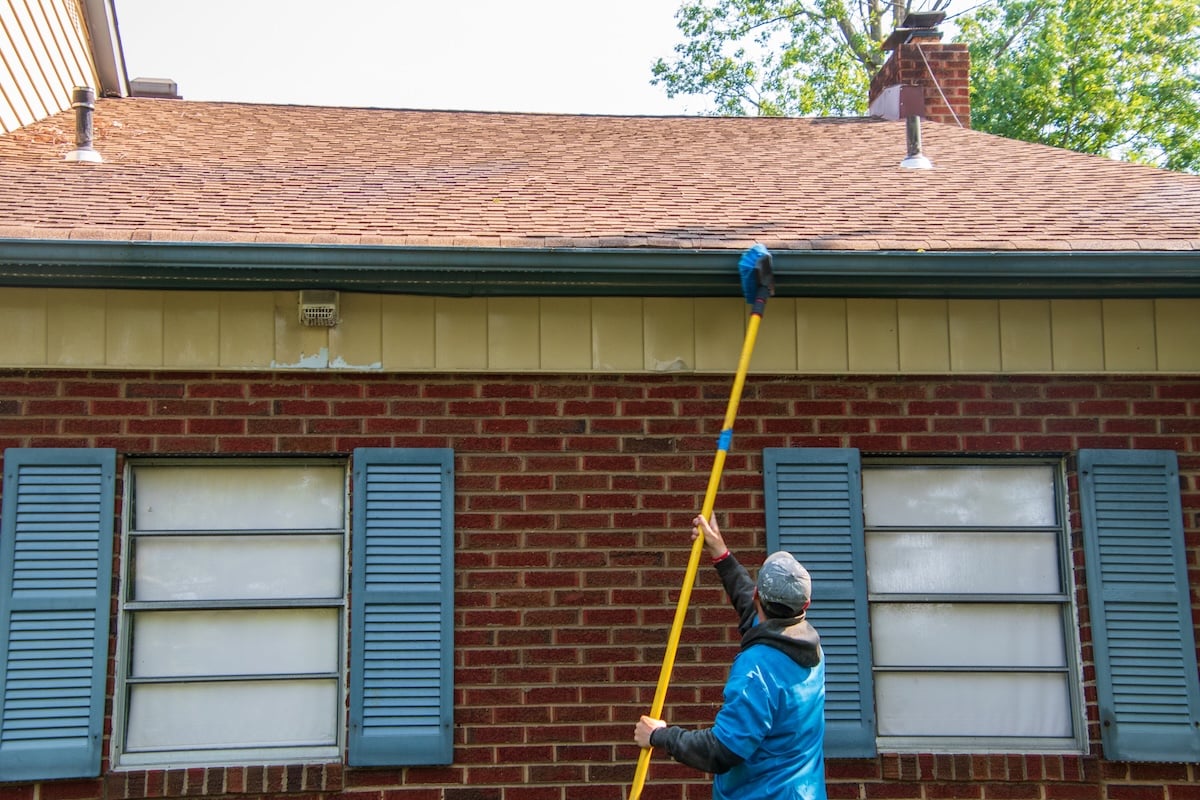
- Pressure washer: Use with caution and at a low setting. Always follow manufacturer guidelines.
- Ladder: If necessary, ensure it’s stable and safe before use.
✅ Best Cleaning Solutions for Vinyl Siding
Store-Bought Vinyl Siding Cleaners
There are many commercial products specifically designed for vinyl siding. These often come as concentrated liquids that you dilute with water. Always follow label instructions and test on a small area first.
DIY Cleaning Solutions
You can make an effective cleaner with ingredients you likely have at home:
- Mild soap solution: Mix 1/3 cup of dish soap (like Dawn) with 1 gallon of warm water.
- Vinegar mix: Combine 70% water with 30% white vinegar to kill mold and mildew naturally.
- Oxygen bleach mix: Safe for plants and powerful on stains—mix per package directions.
Avoid using chlorine bleach unless absolutely necessary, and never mix bleach with other chemicals like ammonia.
📋 How To Clean Vinyl Siding: Step-by-Step
Follow these steps for a safe, thorough clean that won’t damage your siding:
1. Inspect and Prepare the Area
- Look for cracks or loose panels: Repair any damage before cleaning to prevent water infiltration.
- Cover landscaping: Use tarps or plastic sheeting to protect flowers and shrubs.
- Close windows and doors: Prevent water from seeping inside your home.
- Turn off exterior power: Especially near outlets and lights.
2. Mix Your Cleaning Solution
In a bucket or pump sprayer, combine your chosen cleaning solution. Make sure to read all labels and use proper safety precautions when handling cleaning agents.
3. Apply the Cleaning Solution
Use a long-handled soft brush or sponge to apply the solution to the siding. Start from the bottom and work your way up to avoid streaking.
- Let it sit: Allow the solution to sit for 5–10 minutes (but don’t let it dry).
- Agitate gently: Use your brush to scrub especially dirty or moldy areas.
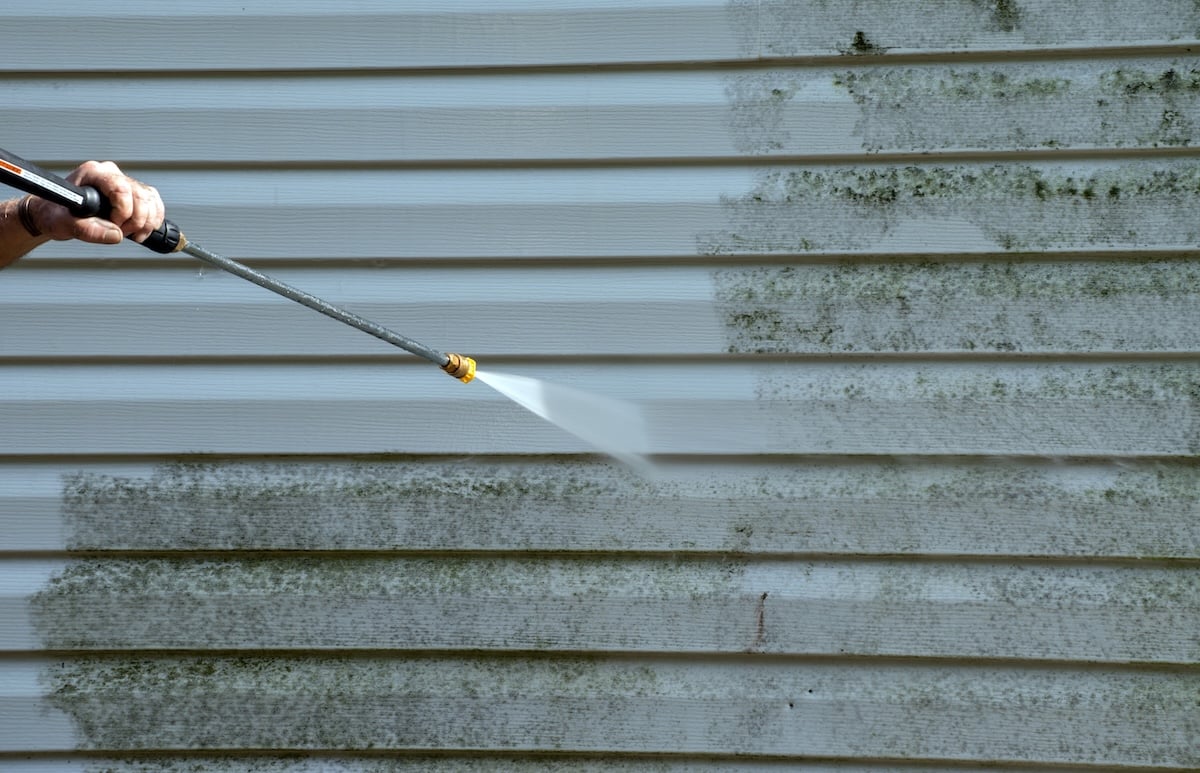
4. Rinse Thoroughly
Using a garden hose or low-pressure setting on a pressure washer, rinse the siding from top to bottom.
- Top-down rinse: This prevents dirt and soap from dripping down on already-clean areas.
- Check for residue: Go back over any areas that still have visible grime or soap.
5. Let It Dry
Allow the siding to air dry completely. This usually only takes a couple of hours on a warm, sunny day. Avoid cleaning during rainy or overly humid weather if you want quick drying.
⭐️ 7 Tips for Better Siding Cleaning Results
- Clean on an overcast day: Direct sunlight can cause streaking and quick drying before rinsing is complete.
- Avoid harsh scrubbing: Too much pressure or stiff bristles can scratch the surface.
- Don’t use high-pressure settings: If using a pressure washer, keep the PSI below 1,500 and use a wide-angle nozzle.
- Work in small sections: This prevents soap from drying before you can rinse it off.
- Use a ladder carefully: If you need to reach higher areas, make sure the ladder is stable and follow safety precautions.
- Rinse plants afterward: Even gentle cleaning solutions can harm delicate landscaping if not rinsed thoroughly.
- Clean annually: Once a year is typically enough unless your home is in a high-pollen, dusty, or shaded area.
🤔 When to Hire a Professional
While most homeowners can clean vinyl siding themselves, there are times when calling a pro makes sense:
- Two-story or multi-level homes: Hard-to-reach areas can pose safety risks without proper equipment.
- Persistent mold or mildew: If standard cleaning solutions don’t work, professionals have access to stronger, siding-safe products.
- Severe buildup: Years of grime may require commercial-grade cleaning methods.
- Busy homeowners: Sometimes it’s worth the cost to let someone else handle it while you enjoy your weekend.
At Vanguard Roofing & Siding, we offer siding inspections and can recommend trustworthy cleaning services if needed.
❌ Common Cleaning Mistakes To Avoid
- Using bleach near plants: Chlorine bleach can harm grass, flowers, and garden beds.
- Skipping rinsing: Leftover soap or solution can lead to streaking or attract more dirt.
- Power washing at close range: This can crack or loosen panels, especially older siding.
- Mixing chemicals: Never combine cleaners like ammonia and bleach—this creates toxic fumes.
- Ignoring damage: Cleaning won’t fix cracks, warping, or loose siding—those issues need repair.
⌛️ How Often Should You Clean Vinyl Siding?
For most homes, once a year is sufficient. However, you may want to clean more frequently if:
- Your home is surrounded by trees or vegetation: More pollen, sap, and organic matter to clean.
- You live in a high-humidity area: Mold and mildew can develop faster.
- You’re near a busy road or construction site: Dust and debris build up more quickly.
Seasonal timing matters too. Spring or early summer is ideal, allowing you to enjoy a clean exterior all season long.
👍 Keep Your Vinyl Siding Looking Its Best
Knowing how to clean vinyl siding isn’t just about appearance—it’s about protecting your investment and making your home last longer. With the right supplies, a little elbow grease, and the step-by-step tips above, your siding can look fresh and stay functional for years to come.
If you’re unsure whether your vinyl siding just needs a deep clean or might be due for replacement, Vanguard Roofing & Siding is here to help. Contact us today for a free inspection and personalized siding recommendations tailored to your home’s needs.